Not rated yet
Workflow (DNN)
MegaForm now puts the everyday workflow controls directly below the form canvas. The Workflow Summary shows what will run when a submission arrives, and Configure workflow opens a simple, readable list of steps. You only need the full BPMN editor for branching, timers, reusable library workflows, or other advanced behavior.
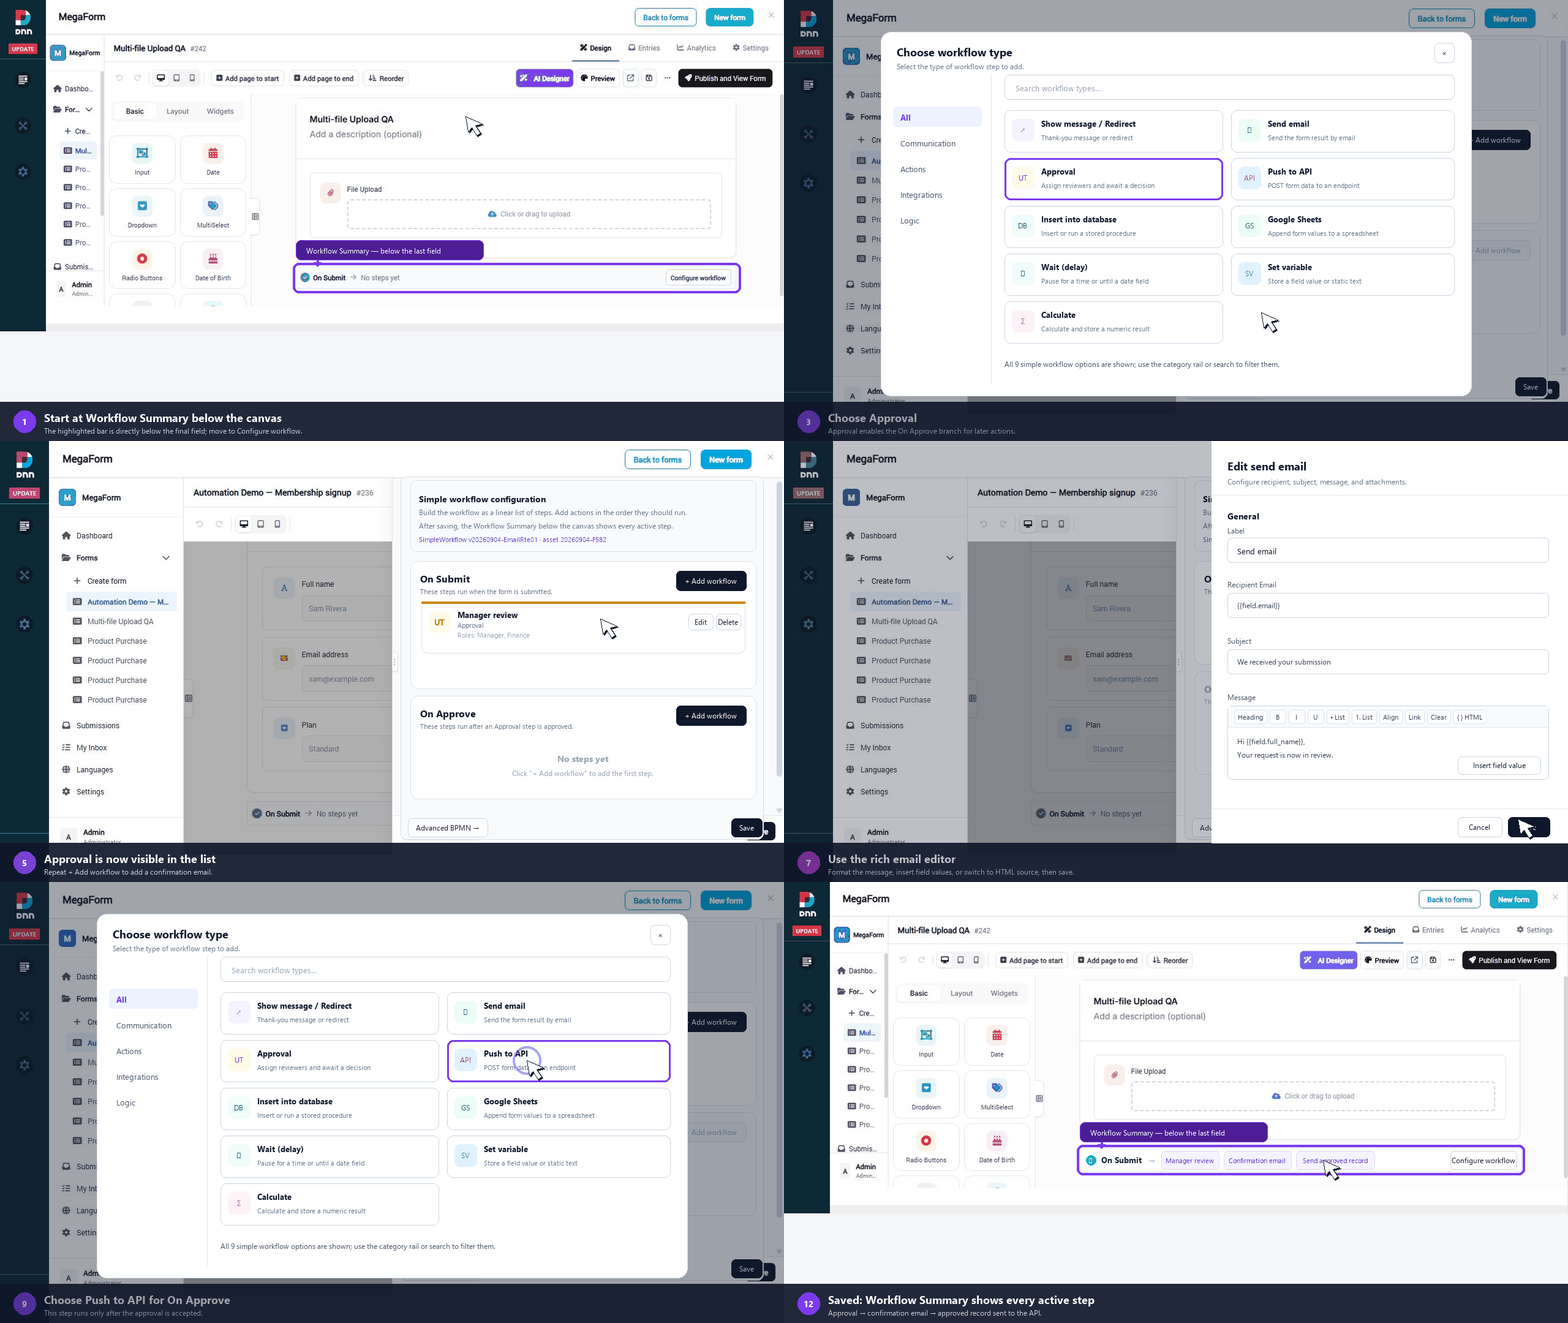
- Open the form in Form Builder → Design.
- Scroll to the bottom of the canvas. The Workflow Summary is the narrow horizontal bar inside the form canvas, directly below the final form field. It begins with On Submit and ends with Configure workflow. It is not the footer of the slide-out workflow panel.
- Select Configure workflow to open the simple workflow panel on the right.
There is no separate Workflow or BPMN tab in the normal form-building path. Keeping the summary with the canvas makes it clear which workflow belongs to the form you are editing.
Build most workflows in the simple editor
- On Submit contains steps that run after the form is submitted. Select + Add workflow to add email, approval, database, webhook, or other available actions.
- Add an Approval step under On Submit when a person must review the submission.
- On Approve becomes available after an Approval step exists. Put the steps that should run only after approval in this section.
- Steps execute from top to bottom. Review the list, then select Save.
For Send email, the Message field is a rich-text editor. Use its heading, bold, italic, underline, list, alignment, link, and clear-format controls; insert field-value tokens; or switch to HTML source when exact markup is required. Recipient, CC/BCC, sender, reply-to, subject, message, attachments, and conditions stay with the same workflow step.
After saving, close the panel and check the Workflow Summary again. It should show the configured actions instead of No steps yet.
The current DNN builder treats “after submission” as part of the form's workflow. Start from the Workflow Summary below the final field instead of looking for a separate After Submission page or a legacy group of notification and webhook settings.
| What you want after Submit |
Add this workflow step |
| Show a thank-you message, send the visitor to another page, or combine a message with a redirect |
Show message / Redirect |
| Email the respondent, notify staff, or send a message after approval |
Send email |
| Pause for a reviewer and continue only after a decision |
Approval |
| POST the submission to a webhook, CRM, ERP, or another service |
Push to API |
| Write values through an approved connection or stored procedure |
Insert into database |
| Append a row to a spreadsheet |
Google Sheets |
| Delay processing or wait until a date |
Wait (delay) |
| Capture a submitted value or reusable constant for later steps |
Set variable |
| Calculate a numeric value for routing or a later action |
Calculate |
Use Show message / Redirect for the visitor-facing result. It can provide the success message or the next-page destination that older documentation called the confirmation experience. Put server-side actions after it—or before it when their result must determine what the visitor sees.
Keep multiple email audiences as separate Send email steps. For example, the first step can acknowledge the respondent, a second can alert staff, and a third can notify the respondent only after an Approval step succeeds. Each step keeps its own recipients, CC/BCC, sender, reply-to, subject, rich message, attachments, and conditions.
Every successful submission is still stored in MegaForm before the configured workflow continues. The workflow then runs on the server in the saved order. This keeps confirmation, email, approval, API, database, spreadsheet, timing, and calculation behavior together with the form instead of splitting the automation across unrelated settings screens.
Simple workflow choices
Open + Add workflow, then use All or filter by Communication, Actions, Integrations, or Logic. The current picker provides these nine choices:
| Choice |
Category |
Use it to |
| Show message / Redirect |
Actions |
Display a thank-you message or send the submitter to another page. |
| Send email |
Communication |
Send the form result to the visitor, an internal team, or an approver. |
| Approval |
Actions |
Assign a user task to reviewers and wait for approve or reject. |
| Push to API |
Integrations |
POST form data to an external endpoint or service. |
| Insert into database |
Integrations |
Insert the submission through a named connection or run a stored procedure. |
| Google Sheets |
Integrations |
Append submitted values to a Google Sheets spreadsheet. |
| Wait (delay) |
Logic |
Pause for a fixed duration or until a date value. |
| Set variable |
Logic |
Store a field value or static value for later workflow steps. |
| Calculate |
Logic |
Perform a numeric calculation and store its result in a variable. |
The search box filters by workflow name and description. The category rail changes only what is displayed; it does not change execution behavior.
Follow the complete example in the animation
The wide animation keeps the full builder in view and pauses at every click. The purple outline is aligned to the real inline Workflow Summary bar, and the pointer clicks the actual Configure workflow button at the right end of that bar. It builds this three-step workflow:
- Under On Submit, add Approval and assign the Manager and Finance roles.
- Under On Submit, add Send email and use
{{field.email}} for the recipient.
- After Approval enables the section, add Push to API under On Approve.
- Select Save, return to the canvas, and confirm that Workflow Summary shows Manager review, Confirmation email, and Send approved record.
The pointer movement and click ring show exactly which control is used. Each important screen remains visible for roughly two to four seconds before the next action.
When to use Advanced BPMN
Select Advanced BPMN → when the workflow needs multiple branches, gateways, timers, complex conditions, a reusable library workflow, or detailed node-level settings. Advanced BPMN includes the node palette, Library, Samples, Test, Validate BPMN, and Apply BPMN.
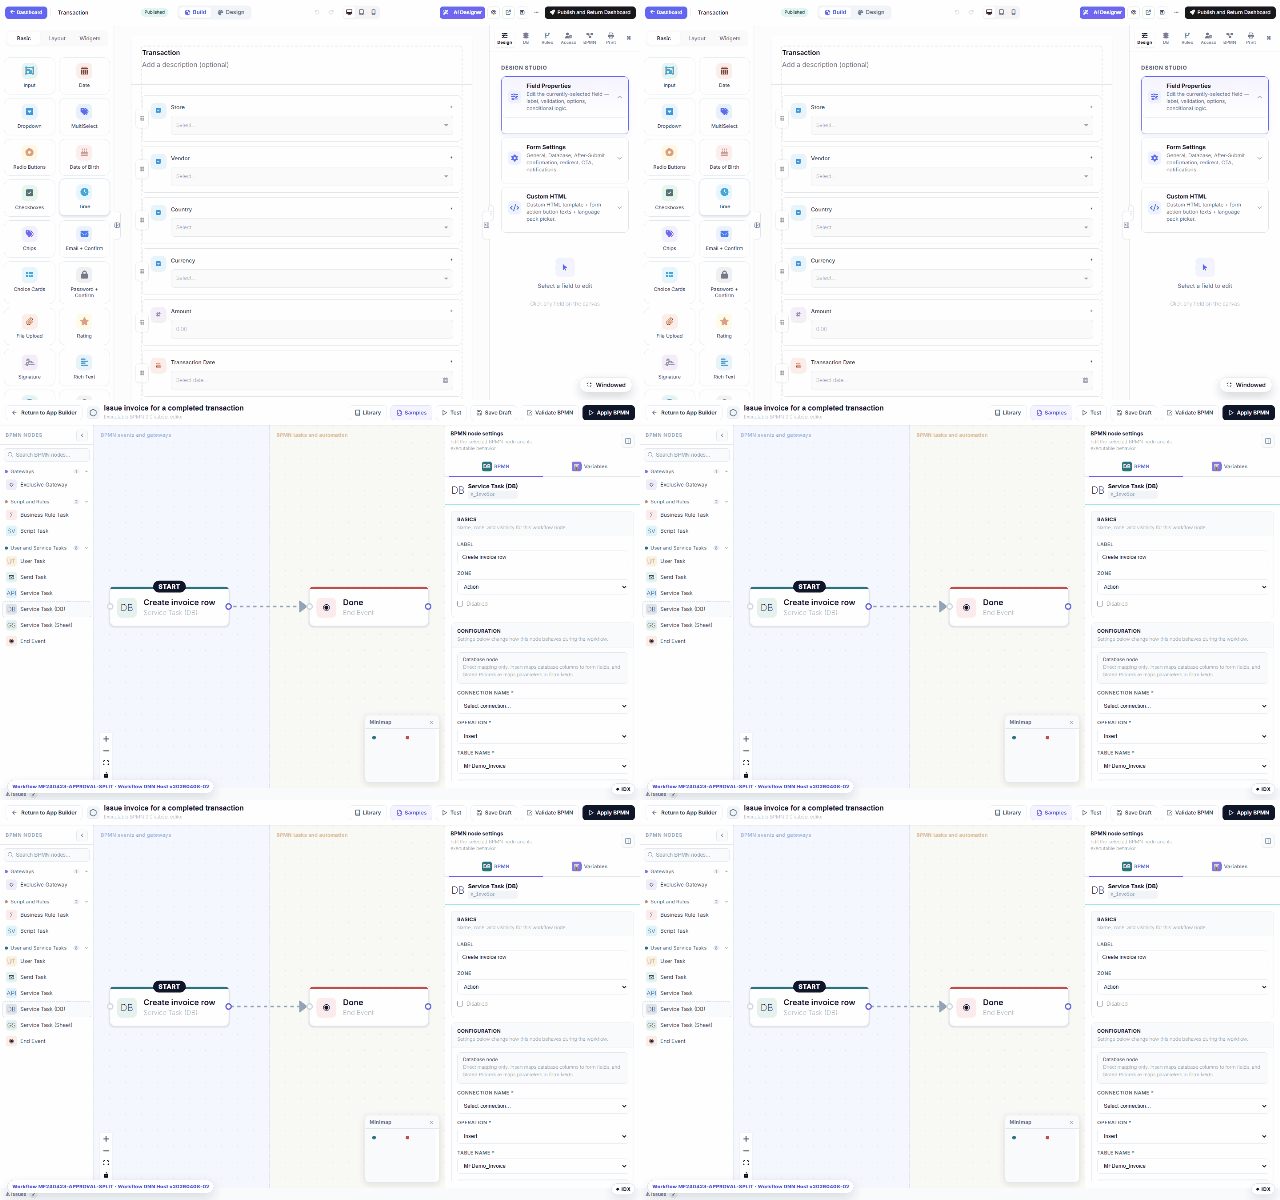
An advanced workflow is still summarized below the form canvas. To edit it safely, open Configure workflow, then choose Edit in Advanced BPMN or Open Advanced BPMN when prompted.
What runs on the server
The saved workflow executes server-side when a submission or approval transition occurs. A User Task / Approval creates work for the assignees in My Inbox. Gateways can route on form values, and service tasks can send email, call an API, write through an allowed database connection, or add a row to Google Sheets.
Before applying an advanced diagram, use Test and Validate BPMN. For a reusable approval chain shared by several forms, see Workflow Library.