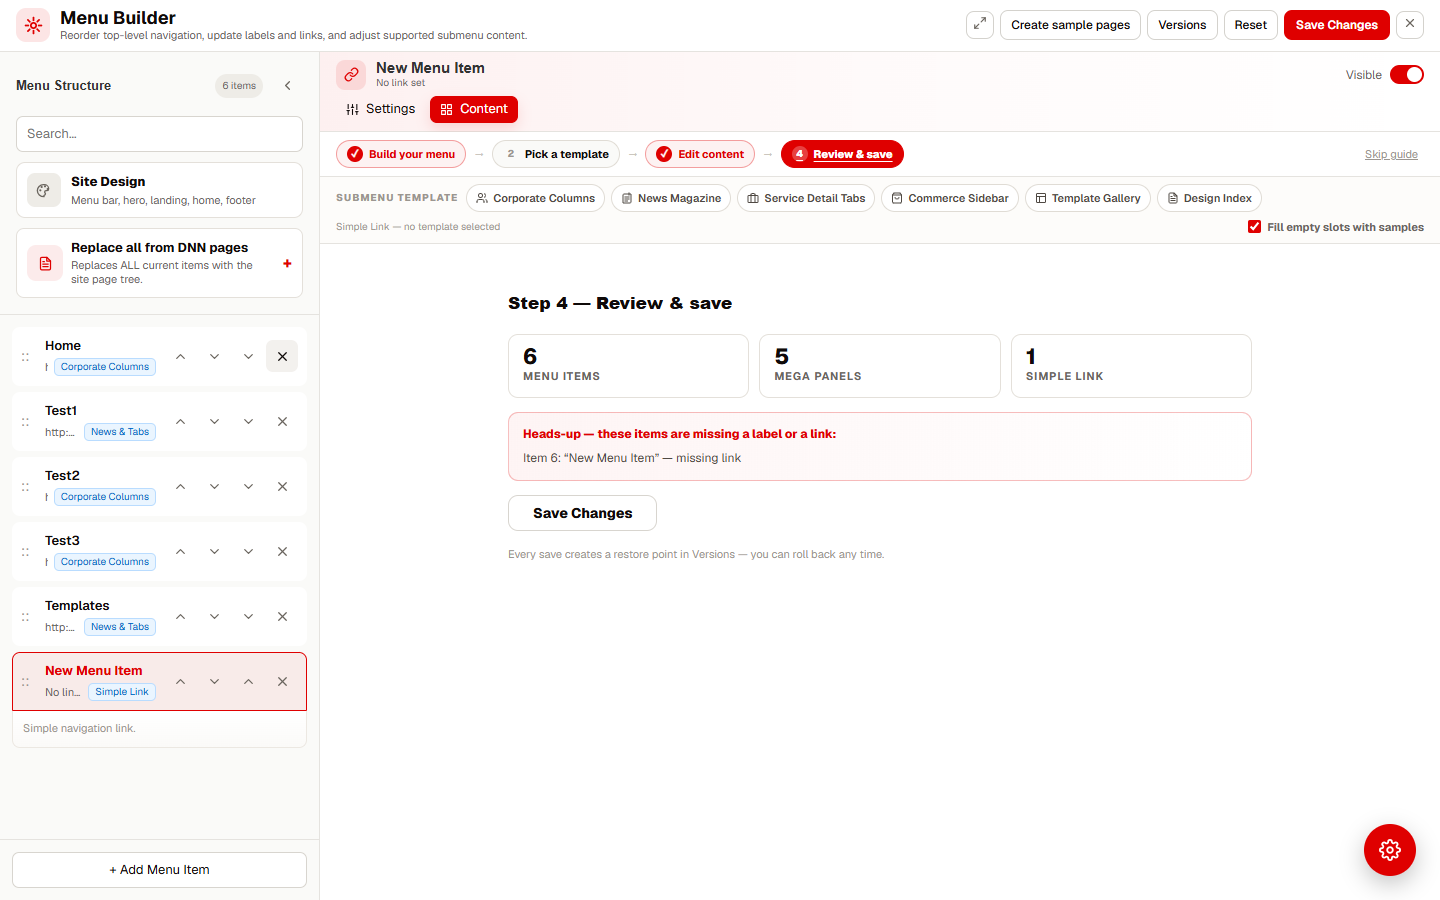
A guided tour of the new ACME Menu Builder: the four-step wizard, six submenu templates, inline content editing, Replace all from DNN pages, Create sample pages, version history and saving.
Not rated yet
The Menu Builder is the in-page editor for the ACME mega menu. A four-step wizard walks you from the first draft to a published menu: Build your menu → Pick a template → Edit content → Review & save. Everything is previewed live and only goes public when you press Save Changes.
Open the builder
- Sign in with a host / superuser account.
- In the top utility bar, click the red Edit menu pill on the right.
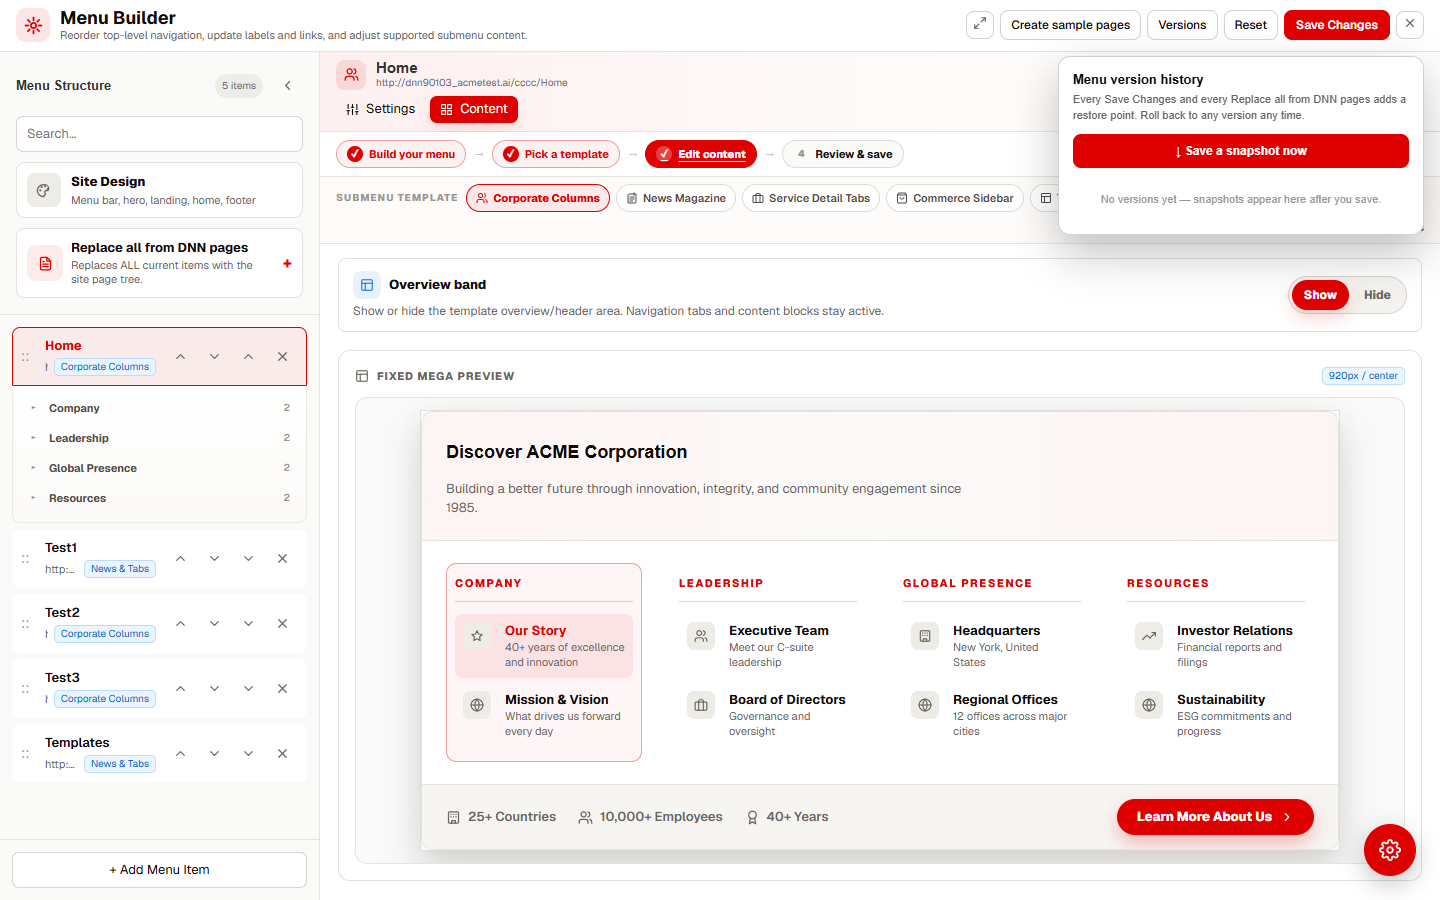
The Menu Builder opens as a full-screen panel over the page: a Menu Structure rail on the left, the selected item's editor in the middle, and a toolbar with Create sample pages, Versions, Reset and Save Changes on top.

The four-step wizard
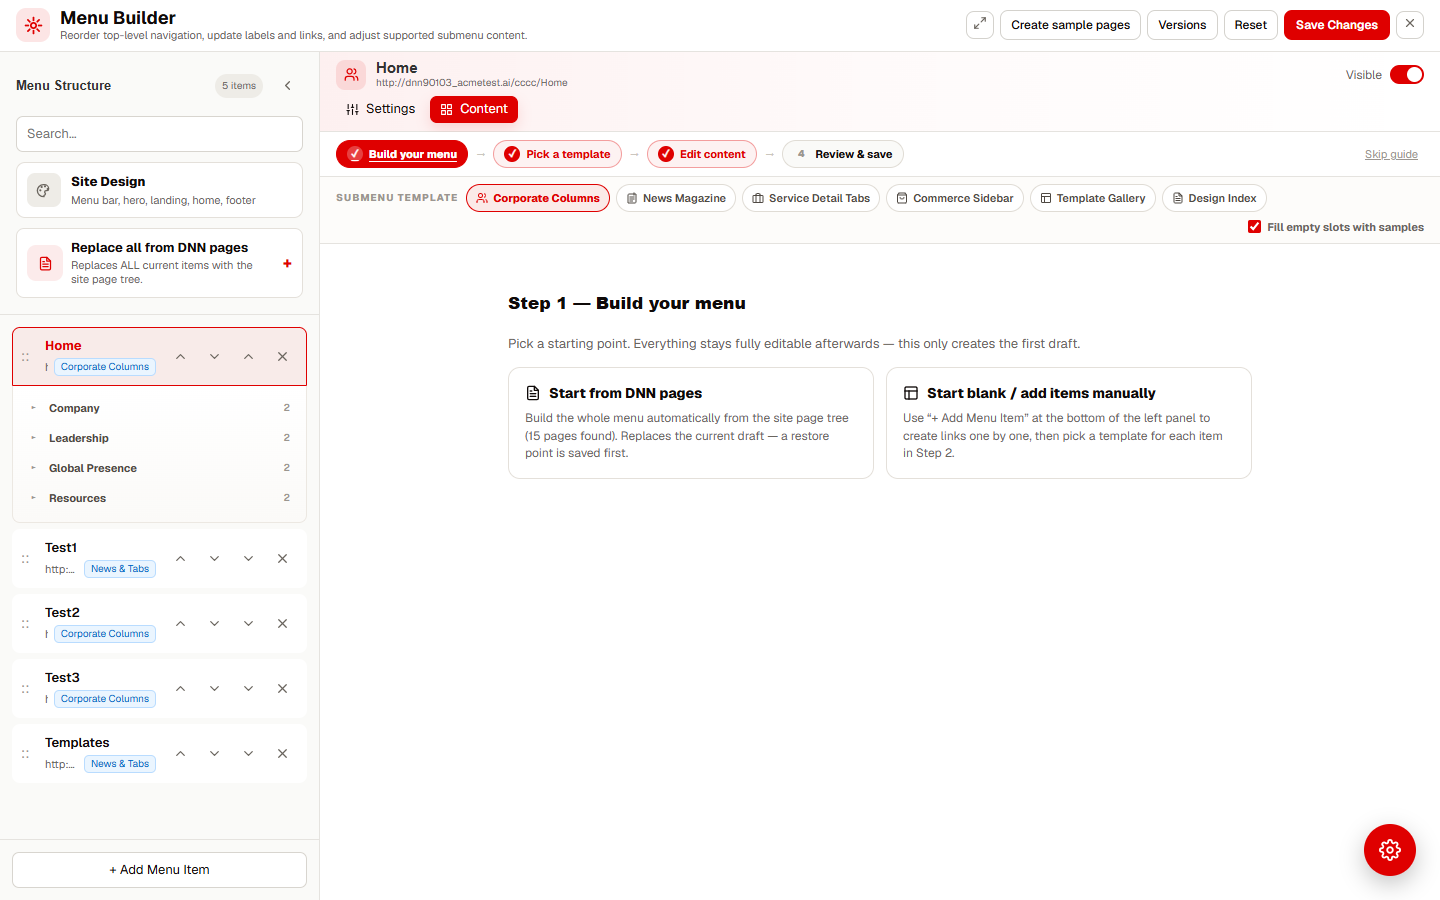
The wizard bar at the top of the editor tracks your progress. Click any step to jump back to it, or use Skip guide on the right if you already know the builder.
- Build your menu — pick a starting point: Start from DNN pages generates the whole menu from the site page tree (a restore point is saved first), or Start blank / add items manually and create links one by one.
- Pick a template — choose one of the six submenu patterns for the selected top item.
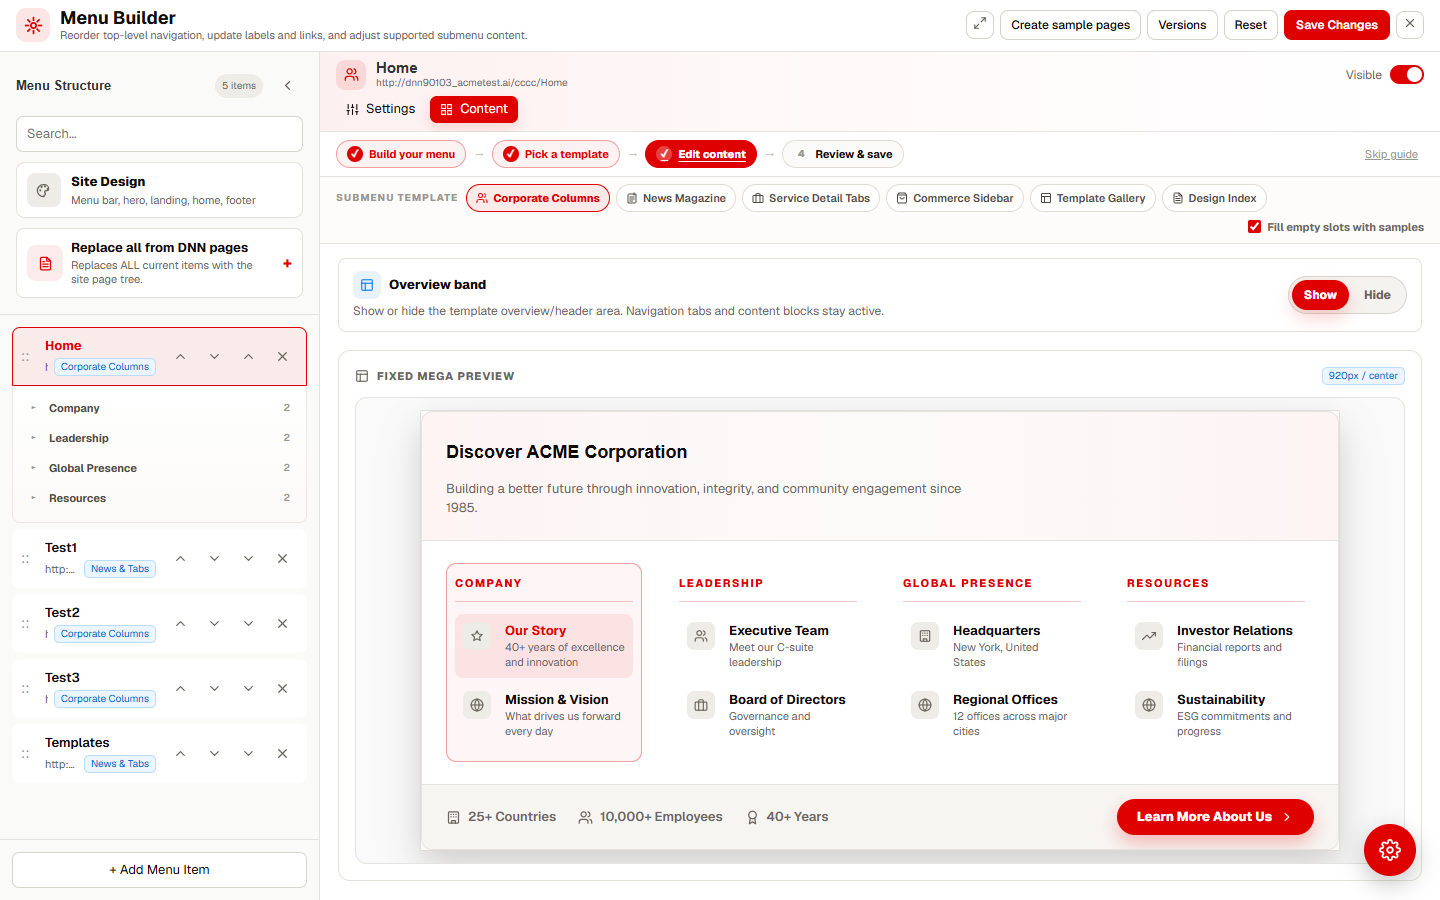
- Edit content — refine labels, links, columns and text with a live mega-menu preview.
- Review & save — check the item counts and the heads-up list, then publish.
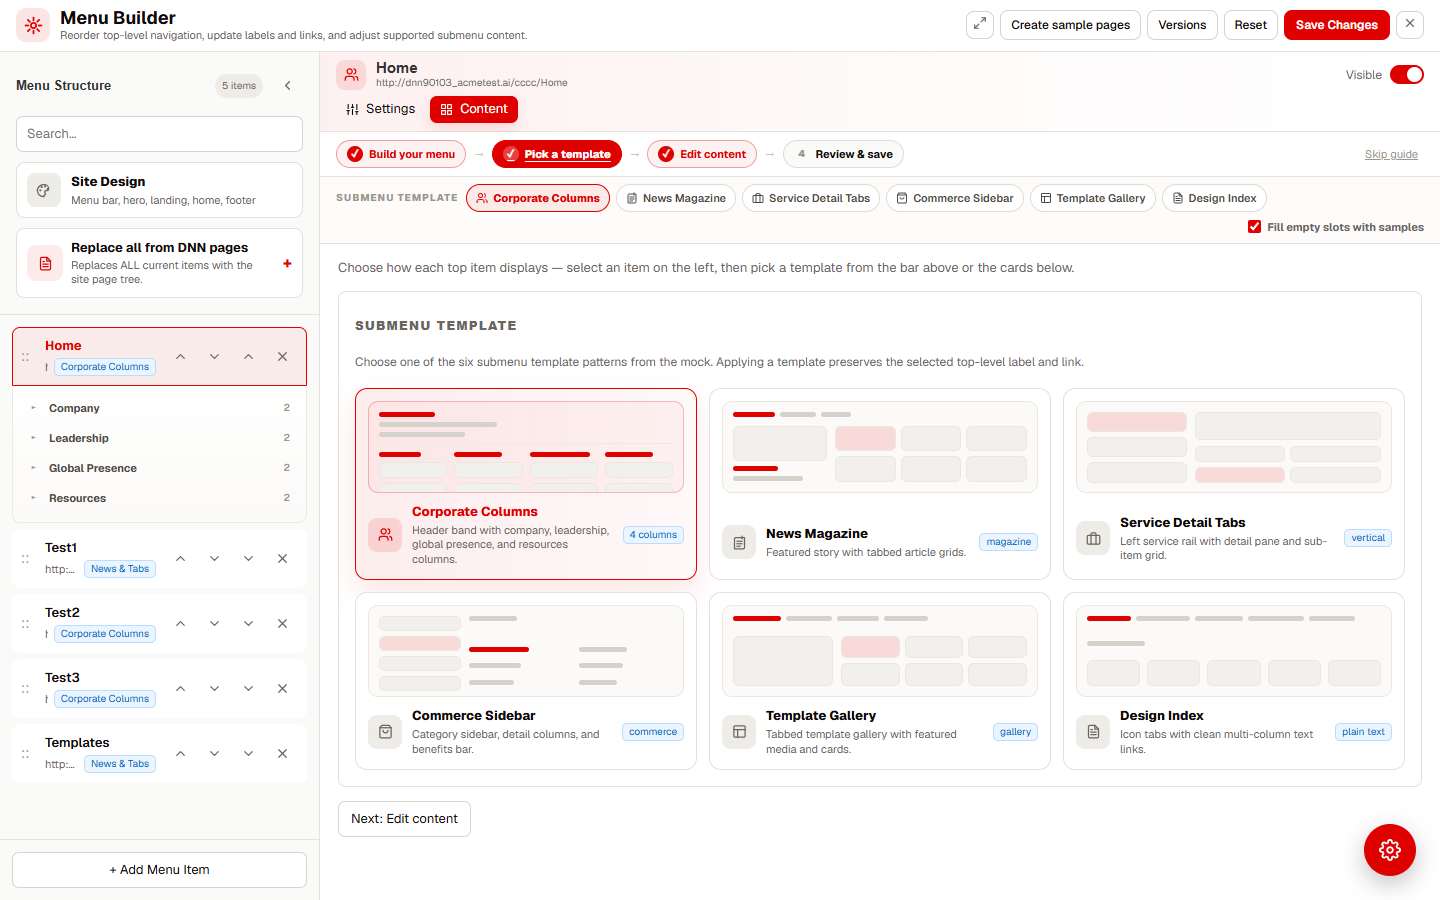
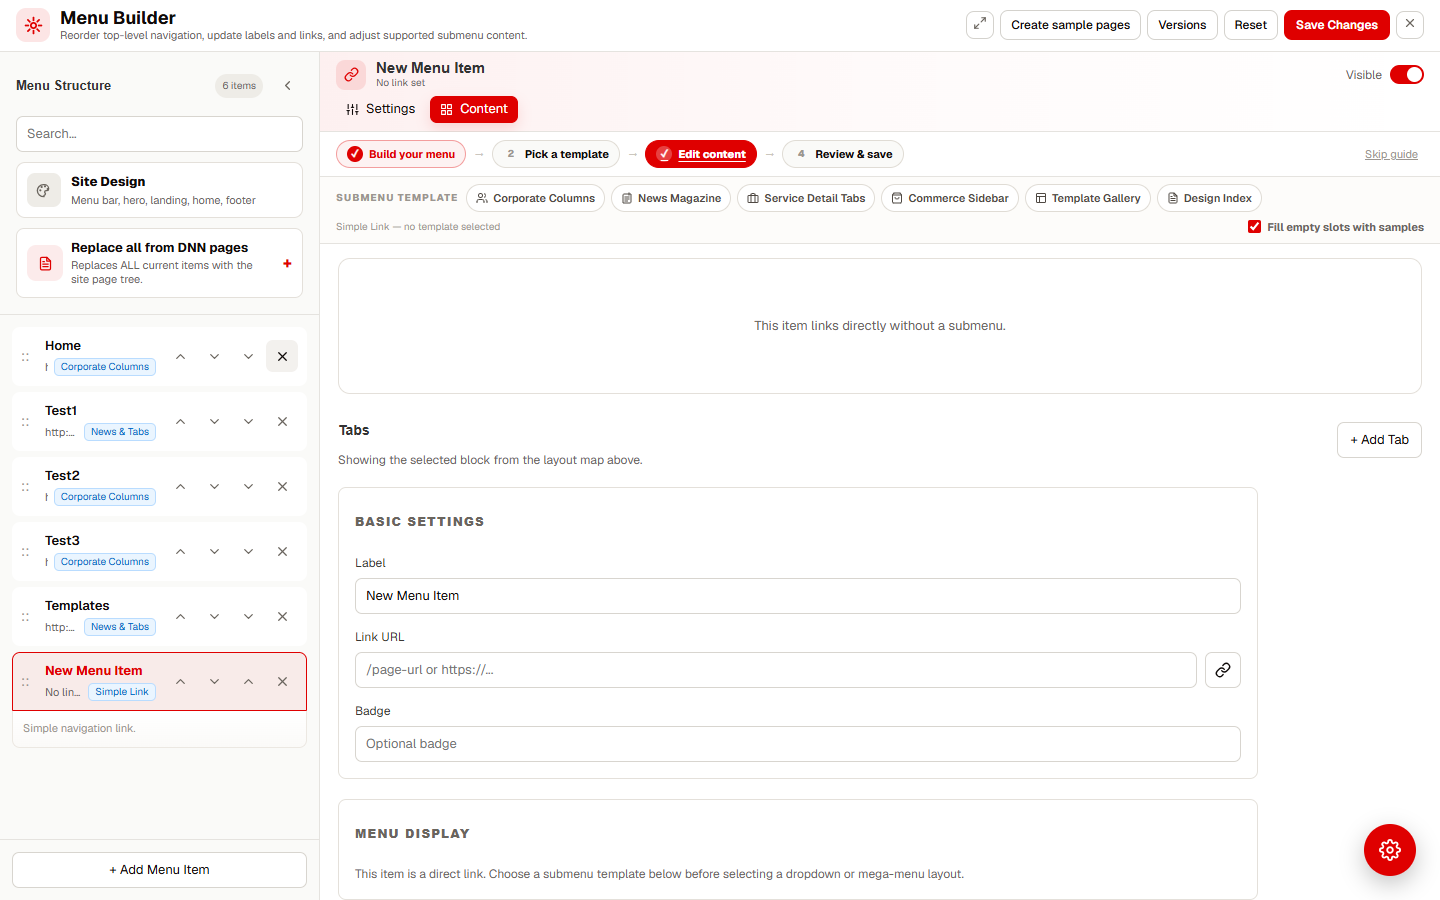
An item can link directly (Simple Link) or open a rich panel below it. The template bar is always visible while you work, with six chips:
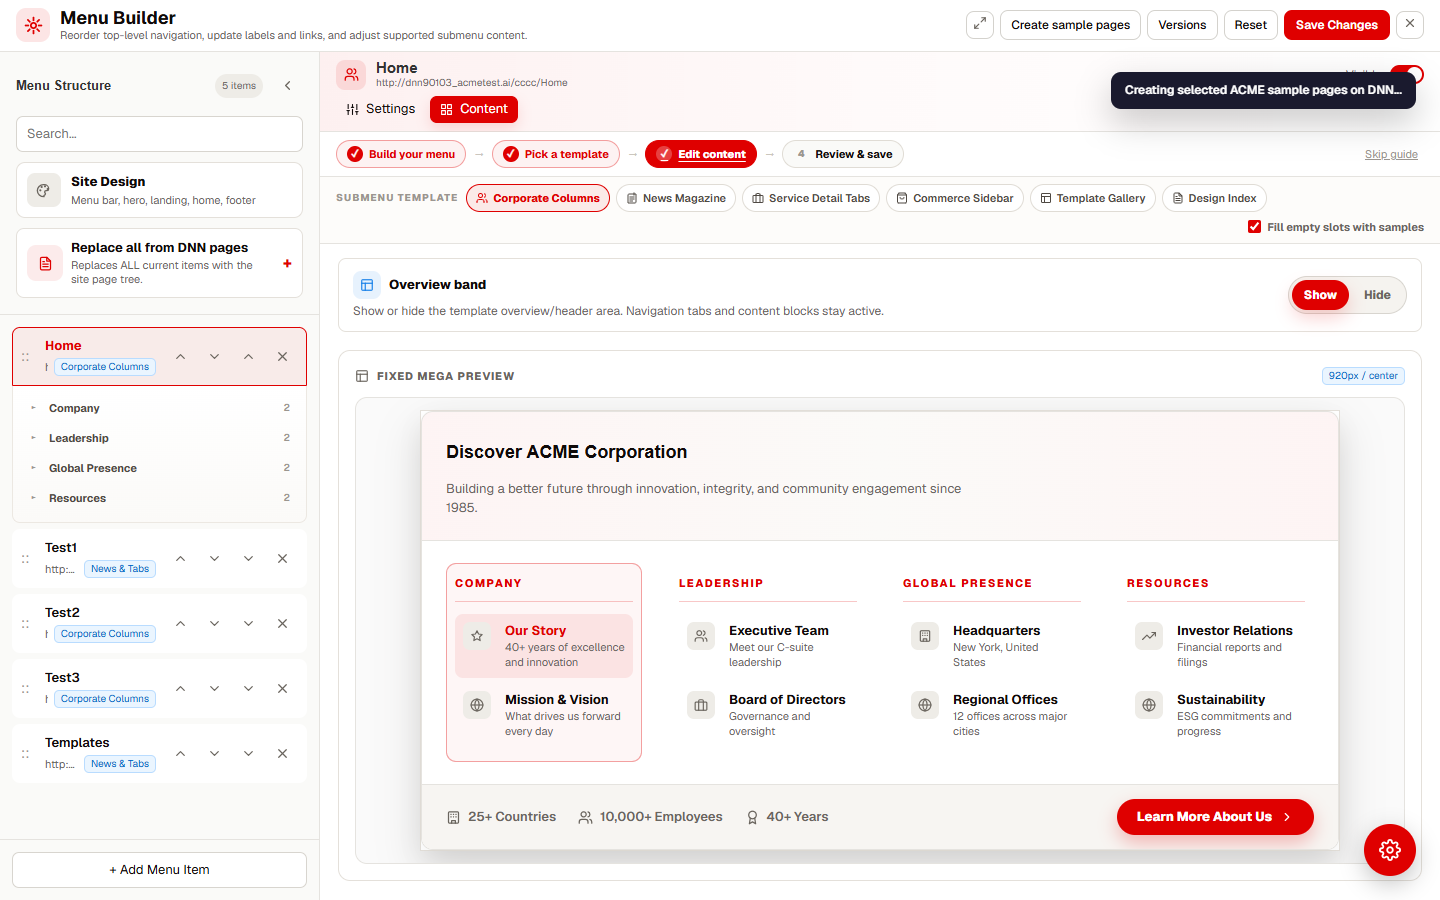
- Corporate Columns — header band with company, leadership, global presence and resources columns.
- News Magazine — featured story with tabbed article grids.
- Service Detail Tabs — left service rail with detail pane and sub-item grid.
- Commerce Sidebar — category sidebar, detail columns and benefits bar.
- Template Gallery — tabbed template gallery with featured media and cards.
- Design Index — icon tabs with clean multi-column text links.
The Fill empty slots with samples toggle adds realistic sample content to empty slots. The samples reference real pages of your DNN page tree, and applying a template always preserves the selected item's label and link, so you can switch patterns safely.
Add, edit and remove items
Edit basic settings
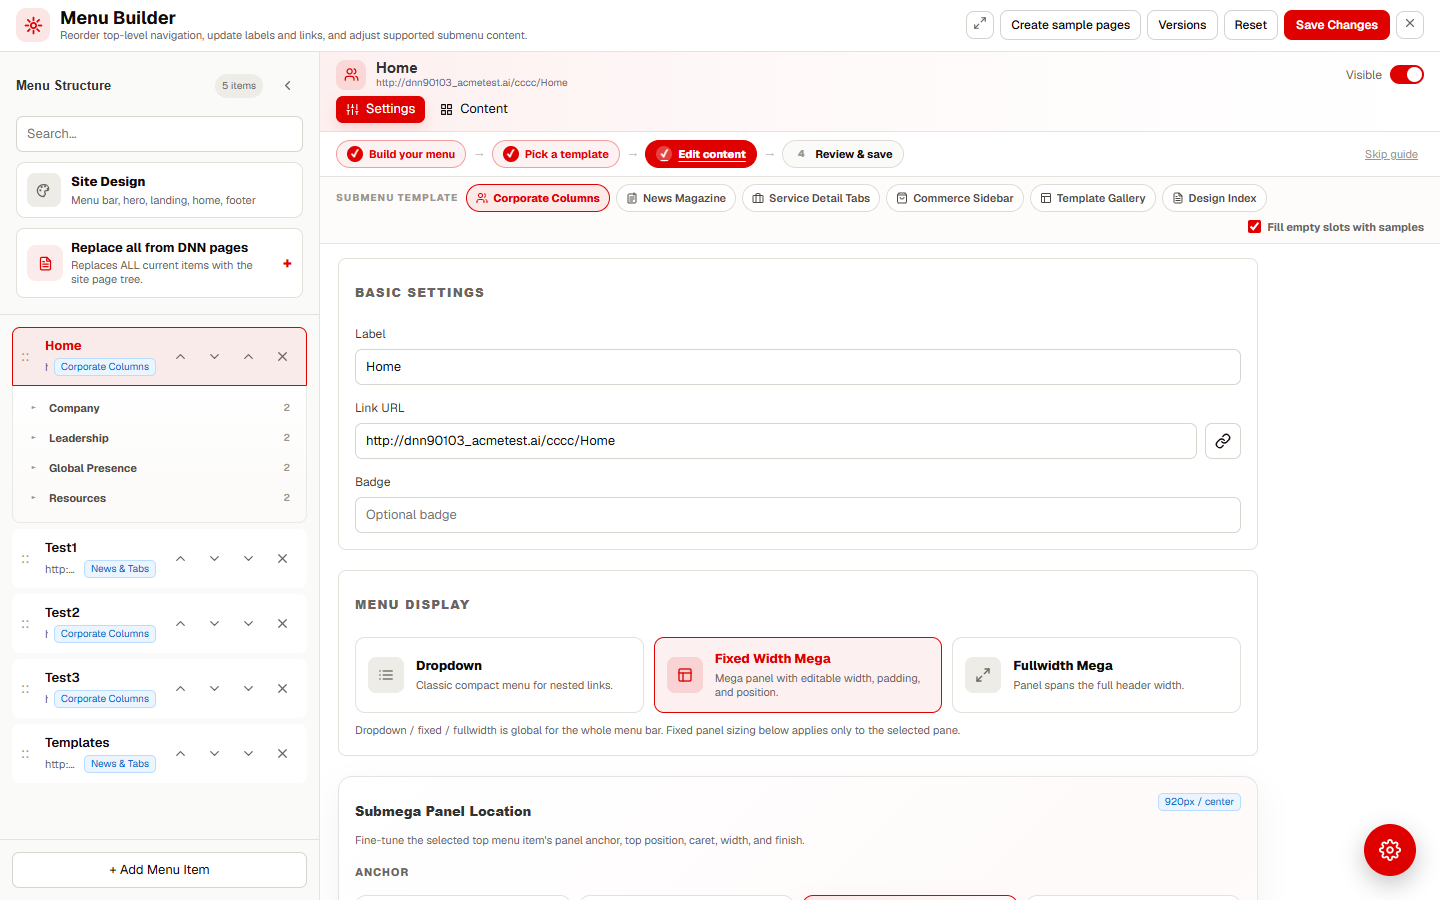
Select an item in the rail and open the Settings tab to change its Label, Link URL (use the link icon to pick a page), optional Badge and the Visible switch. The Menu Display section chooses between Dropdown, Fixed Width Mega and Fullwidth Mega panels.
Edit content inline
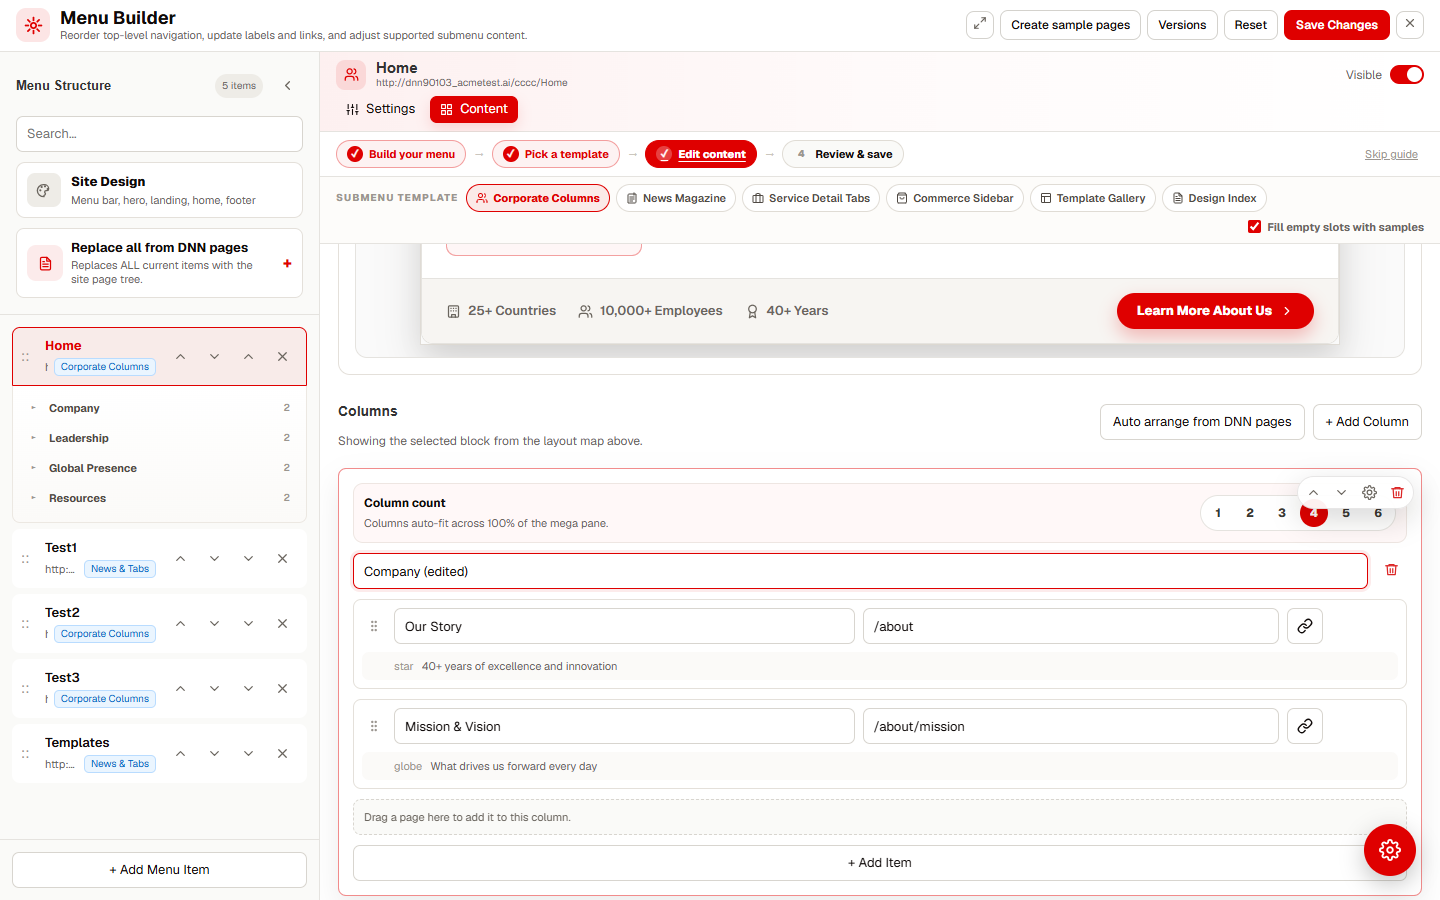
On the Content tab the fixed mega preview is fully editable: hover any block or link and use Edit block / Edit item to change column titles, link labels, URLs, icons and stat bars in place. The Overview band section shows or hides the template header area.
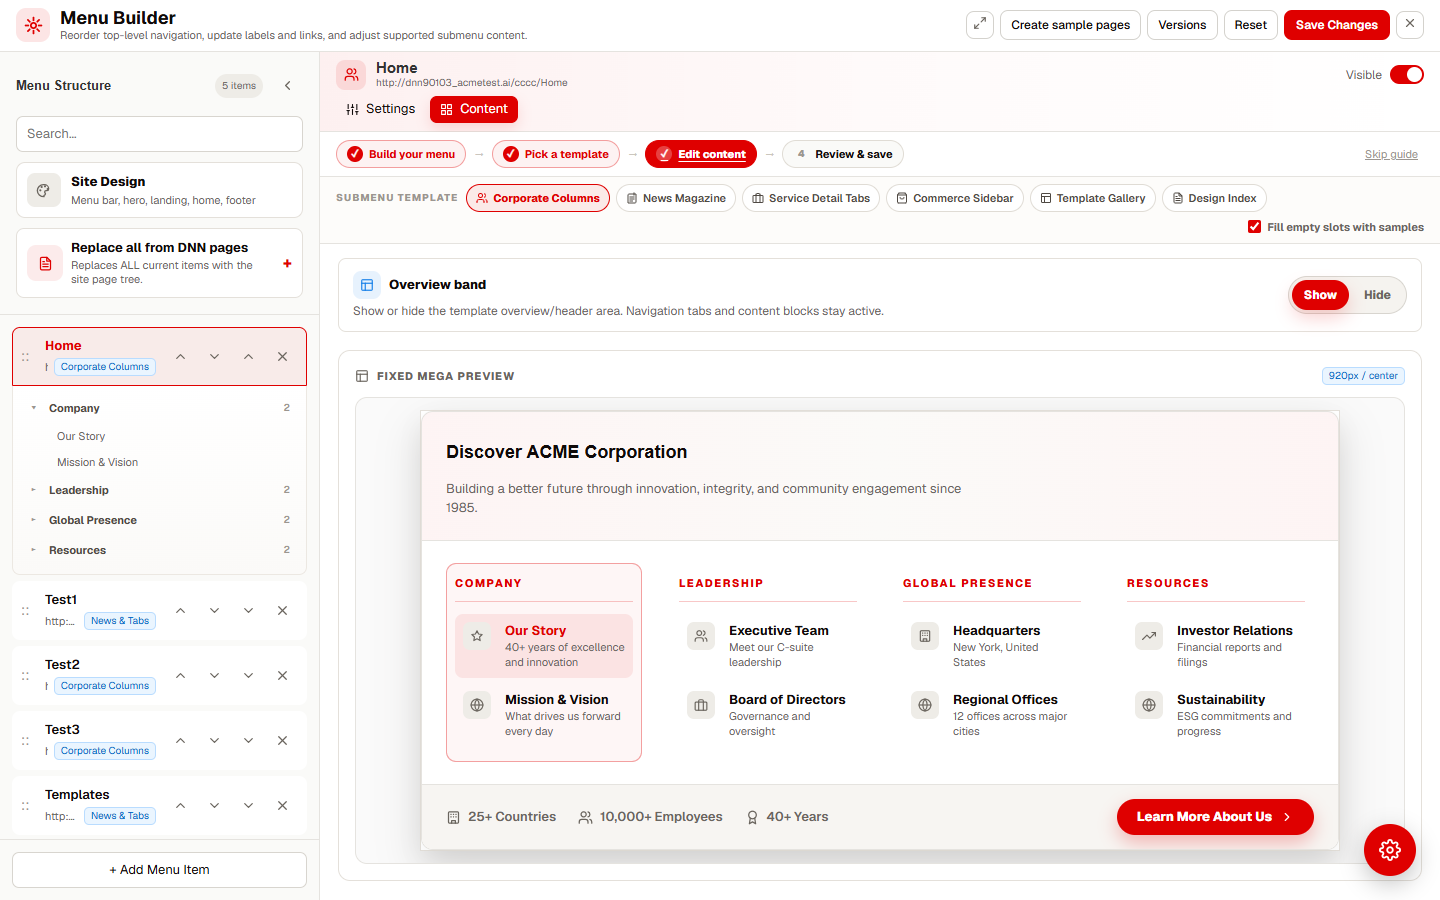
Each top-level item in the rail shows its child count. Click the â–¸ arrow to expand a group and see its child links (for example Our Story, Mission & Vision), then pick the entry you want to restyle.
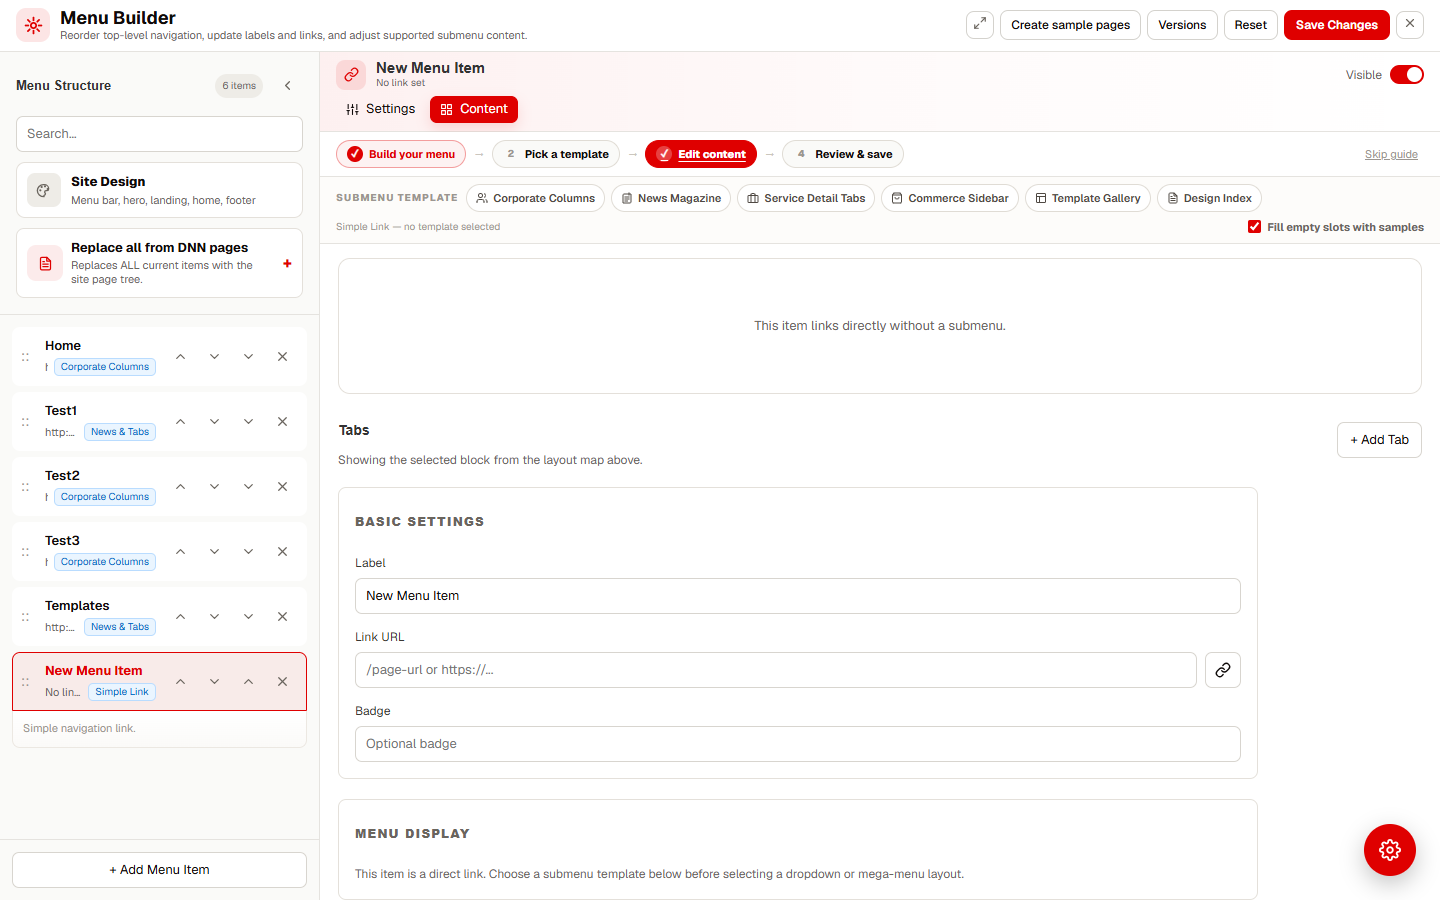
Click + Add Menu Item at the bottom of the rail. A new item is appended, selected automatically, and the wizard points you to Step 2 to pick its template.
Hover an item in the rail and click the × Delete menu item button on its row. Deleting, like every other change, stays local until you save.
Replace all from DNN pages
The Replace all from DNN pages card in the rail rebuilds the entire menu from the current DNN page tree — useful for a fresh start. Confirm the dialog: a restore point is saved automatically first, each root page becomes a top item and a template is auto-assigned.
Warning: this replaces all current items. Your previous menu is kept in Versions, so you can roll back any time.
Create sample pages
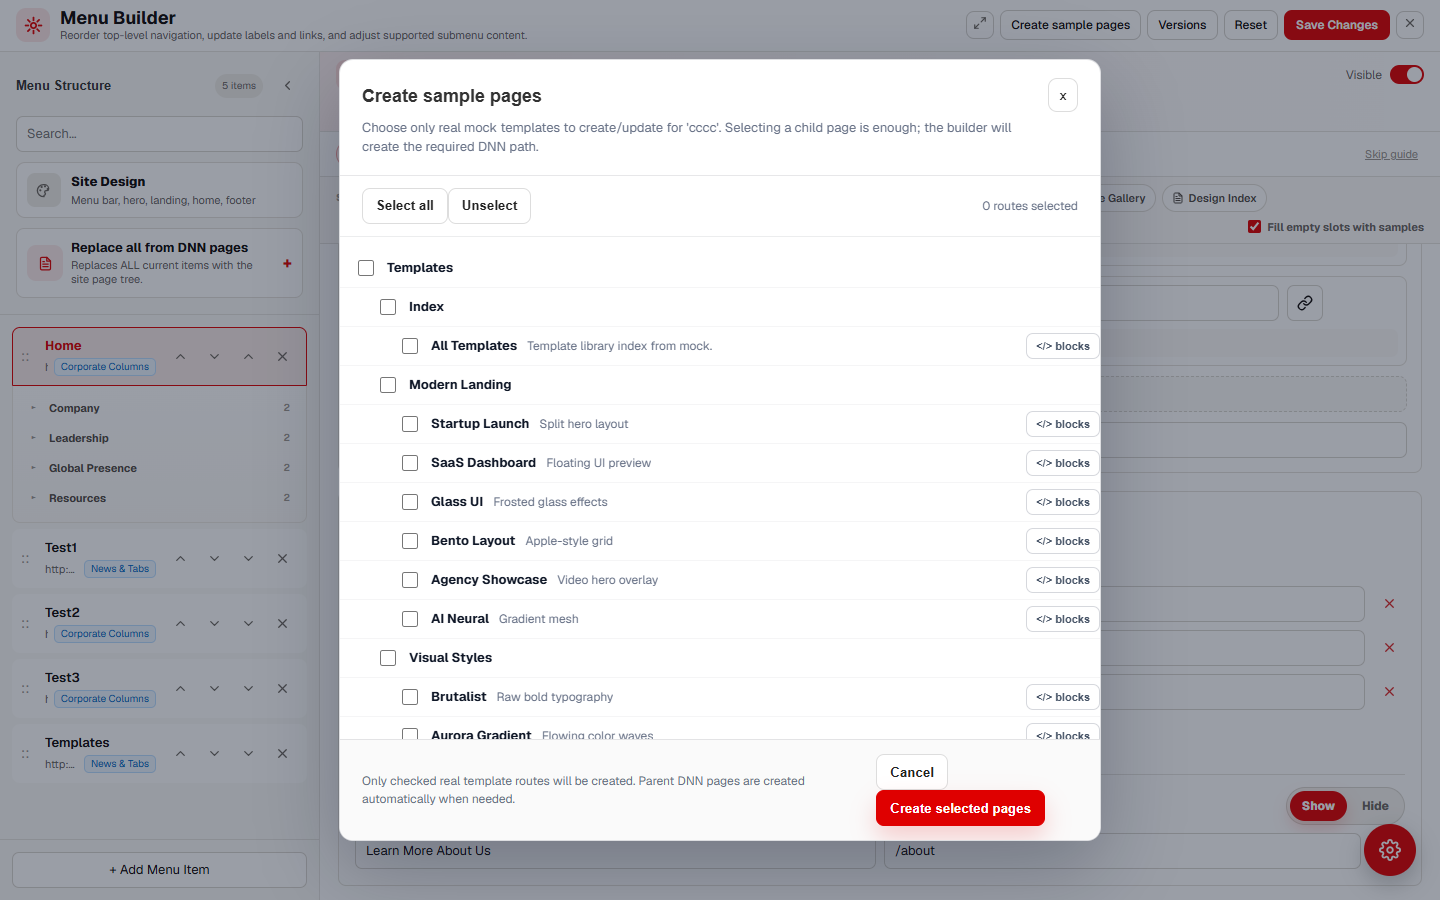
The package ships many ready-made page designs. Click Create sample pages in the toolbar, choose the designs you want (for example Modern Landing with its Startup Launch, SaaS Dashboard, Glass UI, Bento Layout, Agency Showcase and AI Neural routes, or the Visual Styles group with Brutalist and Aurora Gradient) and press Create selected pages. The builder creates the real DNN pages with their content and shows live progress.
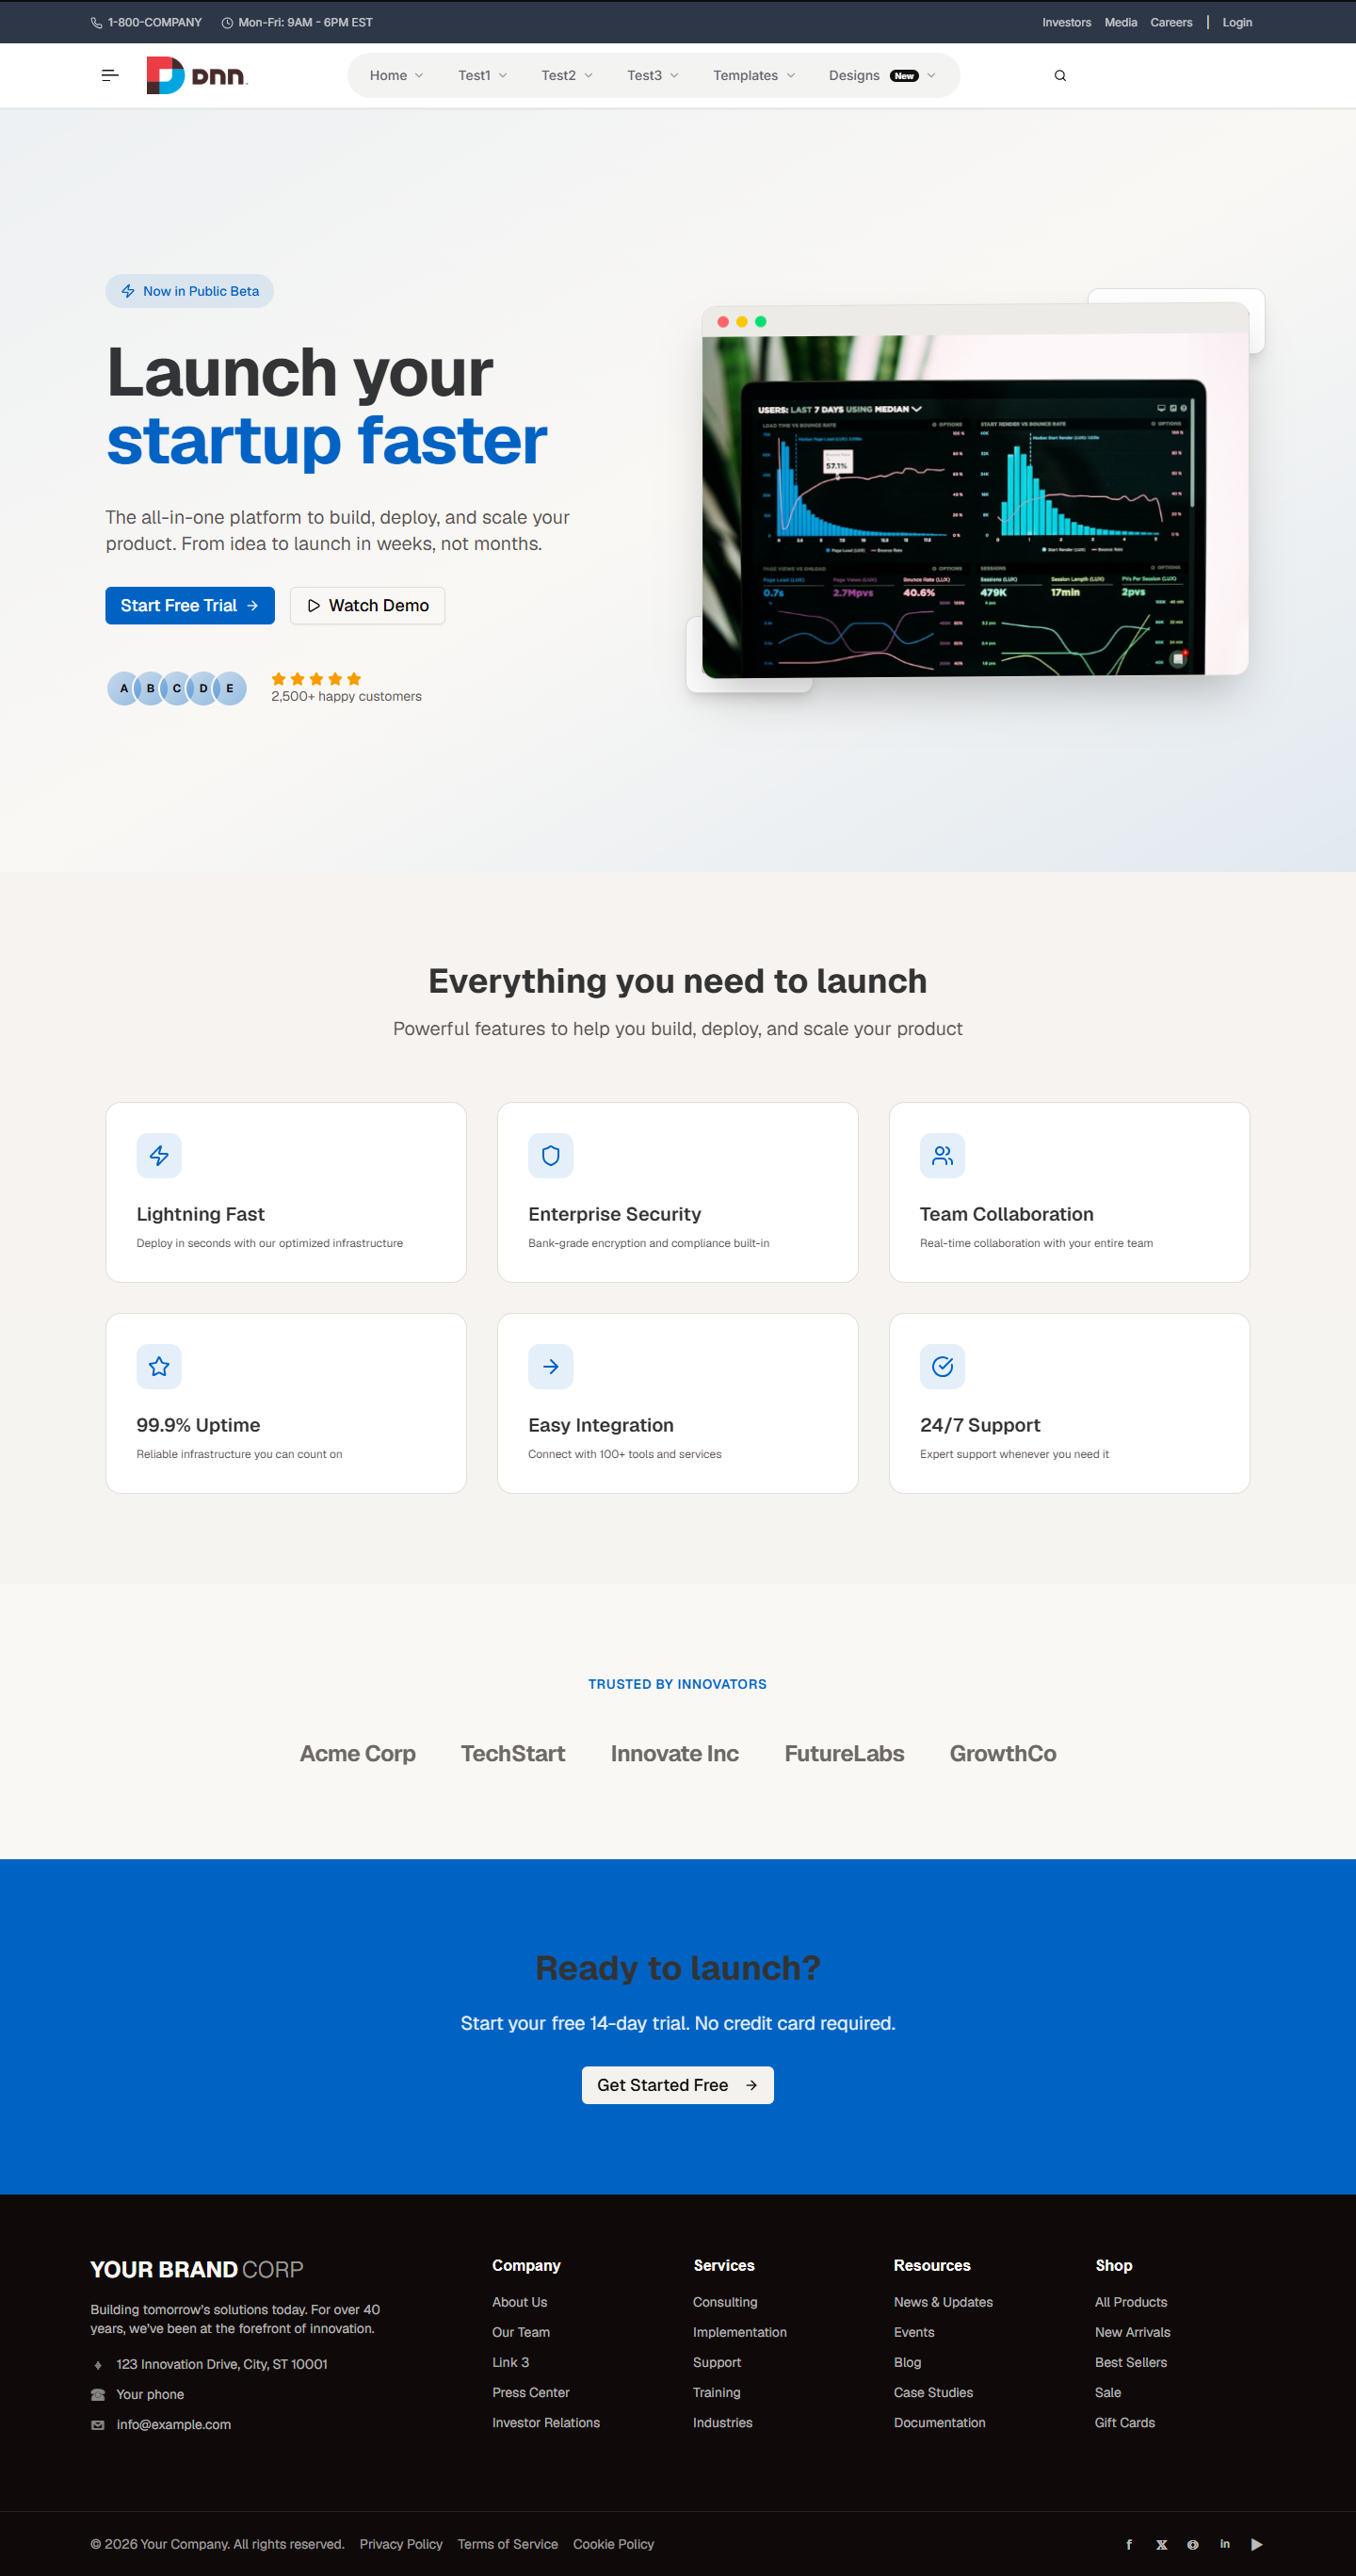
When the run finishes, open the new page from your site: it is a complete, ready-to-customise design with hero, content sections and matching menu entry.
Versions and rollback
Every Save Changes and every Replace all from DNN pages automatically creates a restore point. Click Versions to review them, save a named snapshot manually with Save a snapshot now, and roll back to any earlier version.
Save Changes
Nothing is public until you press Save Changes. The wizard's Review & save step shows item counts (menu items, mega panels, simple links) and a heads-up list of anything missing a label or link, so you can fix problems before visitors see them.